It’s easy to improve the appearance of your home’s interior by using Flexible Veneers to update your home’s curved architecture. Curved architecture can add designer flair and innovative design features into your living spaces, but it often comes with the drawback of being cumbersome when it comes to updating furnishings. Flexible veneers allow you to have the best of both worlds because they are flexible enough to contour to any shape while simultaneously providing an aesthetically pleasing decorative finish. This helpful guide will show you how easy and cost-effective it is to update your home’s curved architecture with Flexible Veneers.
The first step in the process is to identify the areas of your home that could benefit from an update using Flexible Veneers. Curved walls and ceilings are the perfect places to start, but remember that Flexible Veneers can be used on any surface, so don’t be afraid to get creative. Once you have identified the areas you would like to update, the next step is to choose the right Flexible Veneers for the job.
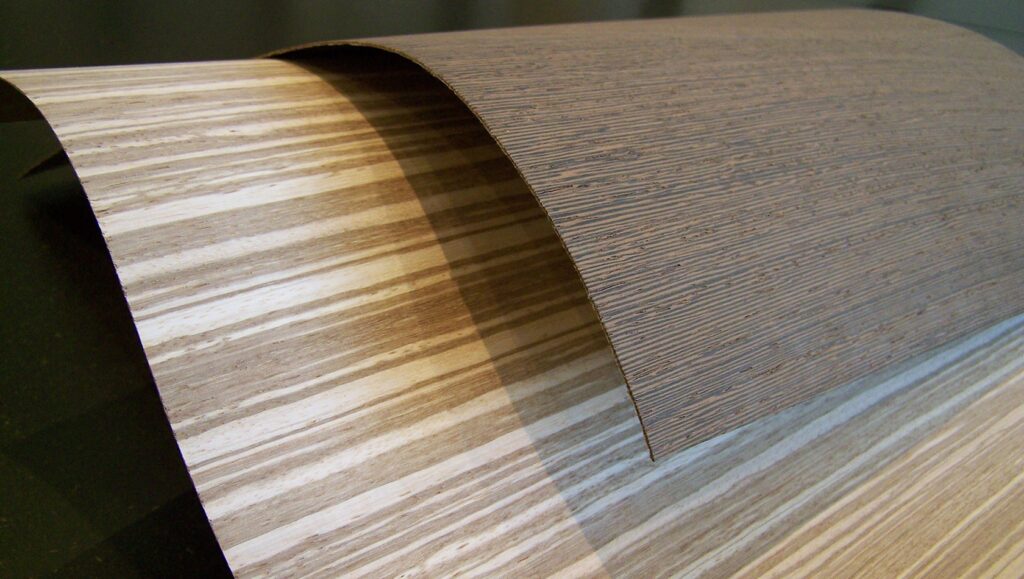
There are a variety of Flexible Veneers to choose from, so take your time and select the ones that will best suit your needs. If you are looking for a sleek, modern look, then you may want to consider a veneer with a glossy finish. If you are looking for a more traditional look, then a wood veneer may be the right choice for you. Once you have selected the perfect Flexible Veneers for your home, the next step is to measure and cut them to size.
The easiest way to do this is to use a template. Simply trace the outline of the area you would like to update onto a piece of cardboard or paper and then use a ruler or pencil to mark out the dimensions. Once you have your template drawn out, simply cut it out and use it as a guide to measure and cut your Flexible Veneers. It is important to measure and cut each Flexible Veneer at a 45 degree angle, regardless of the shape you are covering. This is because it can be difficult to make curved cuts with a straight edge ruler, which means that your veneer will not fit as well if you do not use a 45-degree angle when measuring and cutting.
Once you have measured and cut all of your Flexible Veneers to size, it is time to put them in place. To do this, simply use an adhesive spray to affix them onto the walls or ceilings where you would like them to go. A good option for this type of project is an aerosol spray adhesive because there is no need for messy solvents or open flames. You should also make sure to wear a dust mask when using aerosol adhesives, as they can be harmful to your lungs.
Once your Flexible Veneers are in place, allow them to dry for 24 hours before moving on to the next step. The final step is to seal them with a coat of varnish or sealant. This will help protect them from scratches and fading over time. Allow the varnish or sealant to dry for 24 hours before using your home’s curved architecture with Flexible Veneers.